Modern Living: When Clean Eating Goes Bad

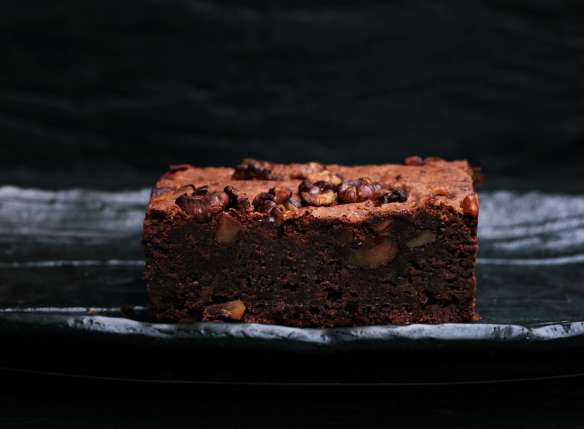
modern-living-chocolate-brownie-1Photo credit: Toa Heftiba

In my new semi-regular blog series on modern living, I’m taking a look at lifestyle trends — like fashion, make-up and eating — and exploring some of the issues related to our modern ways of living.


The other day, I was flipping through a magazine and spied something that made me roll my eyes: a ‘clean eating’ version of a chocolate brownie recipe. The recipe instructed to include baobab powder in the brownie mix: a so-called ‘superfruit’ powder formed inside the fruit of the African baobab tree. Continue reading

Two Delicious Recipes for Autumn Baking

Photo courtesy of kazuend

Photo courtesy of kazuend

At a certain time of year, beginning in September, the stats for one of my posts shoot upwards. It always makes me smile as I know that people are hunting urgently for things to make with their glut of damsons. Continue reading

Spiced Fruit Scones

October is upon us and with it, the colder air of autumn. It’s a great time of the year to bake things with apples and cinnamon, such as these spiced fruit scones. I made two batches of them this week: they are very moreish!

I adapted the recipe to make the scones without refined sugar and decided to use spelt flour as a change from regular wheat flour. If you don’t have coconut sugar and spelt flour to hand, you can simply use all-purpose flour and brown sugar.

Recipe adapted from p. 39 of The Vegetarian Cookbook (1985) by Doreen Keighley

This quantity of mixture makes 8 scones.

Ingredients:

1 lb (3 1/3 cups) wholegrain spelt flour

4 oz (1/2 cup) margarine

4 oz (1/2 cup) sultanas

4 oz (1/2 cup) unrefined coconut sugar

1 dessert apple

2 eggs

4 tsp baking powder

1/2 tsp mixed spice

1/2 tsp cinnamon

Method:

1. Preheat the oven to 450 F (230 C). If you have a convection oven, lower the temperature to 390 F (200 C).

2. Mix the flour together with the baking powder, mixed spice and cinnamon; then rub the margarine into the flour.

3. Beat the eggs and whisk the sugar into the eggs.

4. Grate the apple and add it to the flour mixture, along with the eggs and sugar.

5. Mix together to form a dough, adding the sultanas.

6. On a floured board, roll out the dough and divide it into eight pieces.  Shape the pieces into scones.

7. Place the scones on a greased baking tray, brush the tops with a little milk or beaten egg, then bake for 15 minutes until they are golden brown and your kitchen smells delicious!

Eating Seasonally

One of my most popular posts at the moment is my recipe for Damson Plum Crumble Cake. On the list of search engine terms which have brought people to my blog, “damson dessert recipes”, “baking with damsons” and “damson cake recipes” appear frequently. This increase in searches for things to make with damsons began a couple of weeks ago; at this time of year, plum trees are laden with fruit.

Damson plum cake

The season is changing, the leaves are just beginning to turn and hints of fall are in the air, bringing to mind frosty mornings, log fires and home-made apple crisps. As Keats wrote in his Ode to Autumn, the fall is a “season of mists and mellow fruitfulness”,  a time of abundance which “bend[s] with apples the moss’d cottage trees/And fill[s] all fruit with ripeness to the core”. It is my favourite season!

September in the Forest, by Larisa Koshkina (Public domain image source)

The abundance of delicious fruit and vegetables at this time of year makes it easy to eat seasonally. But I think it is important to eat with the seasons as much as possible all year round. Even though you can buy strawberries at Christmas, cherries in January and apples shipped in from New Zealand, there are many benefits to cooking and eating by nature’s calendar:

  • It is more satisfying to know you are eating food that hasn’t been flown half-way across the world, generating environmentally harmful emissions in the process.
  • Locally grown, seasonal fruit and veg tastes better because it has been allowed to grow and ripen naturally.
  • Eating locally and seasonally supports small businesses and generates income for farmers and growers, thereby helping the local economy.
  • Buying seasonal produce can mean that you experience a world of fruit and veg varieties beyond what is available in the supermarket aisles, such as Heirloom tomato varieties, doughnut peaches and Romanesco cauliflower.
  • Many local/seasonal growers are also organic, growing their produce without the use of harsh chemicals and artificial sprays. Research supports the claim that organic fruit and veg is healthier than ‘conventionally’ grown fruit and veg (before the advent of modern chemicals, organic was the conventional way of growing). An analysis of over 300 scientific studies, published last month in the British Journal of Nutrition, found that “organic crops are up to 60% higher in a number of key antioxidants than conventionally-grown ones”. If you are interested, you can read about the research here.

Pumpkin squash, by Erich Mauber (public domain image source)

Ultimately, eating with the seasons helps you become healthier, boosts your enjoyment of food and supports your local community. What’s not to love?!

Do you make an effort to eat seasonally? If you need a little help to start following nature’s timetable, take a look at Eat the Seasons (US site) or Eat the Seasons (UK site) to find inspiration!

Chocolate cake…..without the guilt!

My sister introduced me to The Unrefined Kitchen when she made their refined sugar-free, gluten-free chocolate cake for my niece’s 2nd birthday. It was scrumptious, so much so that I made one myself this weekend! As this chocolate cake is sweetened with honey and has no refined sugar in it, perhaps it should be renamed the “Eat-As-Much-As-You-Like-Without-Feeling-Guilty Chocolate Cake”. 😉

For the cake recipe and many more delicious recipes, click here to go to the Unrefined Kitchen.

Zucchini parmigiana

This delicious dish is ideal for a simple, nutritious evening meal. Technically, you should use Parmesan cheese in parmigiana recipes but I used cheddar instead and it worked very well!

Ingredients

1 medium onion, finely chopped
2 zucchini, cut into ribbons about 1/2 cm thick
3 cloves garlic, crushed
1 400-gram can of tomatoes
2 cups breadcrumbs
100 grams grated cheese (Parmesan or cheddar)
1/2 tsp pimenton (smoked paprika)
4 tbsp olive oil

1. Dice the onion and sauté with the crushed garlic in 2 tbsp olive oil until golden.
2. Add the can of tomatoes and the pimenton. Simmer, stirring frequently, for 20 minutes.
3. Shallow-fry the sliced zucchini in the other 2 tbsp of olive oil (you will probably need to add more while frying) until the slices are golden and slightly brown. Turn the slices while frying so they are golden on both sides.
4. Layer the zucchini in a baking dish (I used one which was 27 x 21 cm), followed by the tomato sauce, then sprinkle the breadcrumbs over the zucchini and tomato. Finally, sprinkle the grated cheese evenly on top.
5. Bake at 340F/170C for 20 – 25 minutes, until the breadcrumbs are crispy and the cheese is golden.
6. Enjoy! I served it with a side of garden peas and steamed cauliflower but it would also make a great lunch dish along with a green salad.

The best apple cake you will ever taste

Okay, maybe the title of this post is a little hyperbolic, but the apple cake recipe I am about to show you definitely merits recognition!

My young nieces go to a kindergarten which is run along the lines of the Waldorf philosophy of education developed by Rudolf Steiner in the early 1920s (if you’re interested, you can read more about Waldorf education by clicking here).

Waldorf has German and Austrian origins and many of the recipes that the schools use are traditional German recipes. The cakes are excellent — wholesome but incredibly tasty. I have long wanted to visit Austria just so I can sample the amazing kuchen and torten! The preschool/kindergarten, teacher recently gave my sister this recipe and she passed it along to me. It’s a perfect recipe if you have apples in abundance — simple, quick to make and delicious with a cup of coffee.

GERMAN APPLE CAKE

Ingredients

270 g butter or margarine
180 g brown sugar
5 medium eggs
270 g flour
2 1/2 tsp baking powder
2 tsp cinnamon
3 – 4 peeled cooking apples, either sliced in small cubes or thin slices.
80 g raisins or sultanas

Method

1. Preheat your oven to 350F (180C). If you’re using a convection oven, you may need to slightly reduce the temperature.
2. Mix the butter/margarine and sugar until it is well blended. Gradually add the beaten eggs and continue to mix together.
3. Prepare the apples by peeling, coring and finely slicing them. Add the flour, baking powder, cinnamon, sultanas/raisins and apples. Mix together.
4. Line a square or oblong baking dish with baking parchment/greaseproof paper. Pour your cake mixture into the dish and level it with a spoon.
5. Bake for around 45 minutes. You might need to reduce the temperature slightly during the last 10 – 15 minutes of cooking to ensure the top does not brown too much.
6. The cake is done when you can insert a knife into it and it comes out clean. Cut into squares and enjoy!

A delicious autumnal breakfast & brunch recipe

Just a few months ago, the apple trees were covered in blossom.

Apple blossom in the garden. Collage created with photovisi.com. Photos Grace @ Cultural Life copyright 2013

Apple blossom in the garden. Collage created with photovisi.com. Photos Grace @ Cultural Life copyright 2013

Now, they are heavy with fruit.

I love baking and making recipes with apples so when I saw this amazing Dutch apple pancake recipe, I knew I had to make it. I prepared it for brunch last Sunday and it is a delicious way to use up apples from the garden. The scent of apple slowly cooking with cinnamon and brown sugar is divine and the finished result is even better. It is a wonderful breakfast or brunch recipe which is perfect for this time of year.

Apple Pannekoeken (Dutch Pancake) – with thanks to Jill from Dulce Dough for giving me permission to reprint the recipe here. Do pay a visit to Dulce Dough; Jill has many more lovely recipes there.

Ingredients

2 tablespoons butter
3 eggs
1/8 teaspoon salt
1/2 cup milk
1/2 cup all-purpose flour
Powdered sugar (optional)

For Topping

1 teaspoon cinnamon
1/4 teaspoon nutmeg
1/2 cup brown sugar, packed
2 medium cooking apples, peeled, cored, and thinly sliced
1/4 cup butter

Instructions

1. Make sure your oven rack is in the middle of your oven, then put butter into an oven-safe skillet or pie plate, place into the oven, and preheat 425°F.

2. While waiting for the butter to melt, prepare your batter by beating the eggs in a large bowl; add the salt, milk, and flour and continue to beat until smooth.

3. When butter is melted, remove skillet or pie plate and tilt to coat with butter, then carefully pour in the egg mixture.

4. Bake for about 15-18 minutes without opening the oven door. (The pannekoeken will puff as it bakes and is ready when it is browned and crisp around the edges.)

5. To make the apple topping, combine the brown sugar, cinnamon, and nutmeg in a bowl.

6. Add the apples to the bowl and mix gently to coat; set aside.

7. In a large saucepan, melt the butter over low heat.

8. Add the apple mixture and cook over medium heat until the apples are tender.

9. Carefully spoon apple topping over hot pannekoeken, sprinkle with powdered sugar if desired, cut into wedges, and serve immediately.

Do you have a favorite apple recipe you would like to share? Let me know by leaving a comment on this post.
Food: celeriac soup recipe

Source: Wikipedia. Author: DocteurCosmos

Photo credit: Wikipedia. Author: DocteurCosmos

Celeriac – celery root – isn’t going to be winning any beauty contests any time soon. But let’s not be judgemental. Despite its unattractive appearance, it is a versatile and delicious vegetable which is perfect in blended soups. This soup is creamy and lovely, ideal for chillier days as autumn begins to creep into the air.

Ingredients

1 large white onion, diced
2 medium leeks, finely chopped
1 large celeriac (celery root), chopped into small cubes
4 cloves garlic, finely chopped
1/2 tsp paprika
Approx. 8 cups/2 litres vegetable stock
1 cup milk
2 tbsp olive oil
Salt and pepper, to taste

Step 1: Sauté the onion, leek and garlic in the olive oil, stirring frequently for 10 – 15 minutes, until they are golden brown.
Step 2: Add the celeriac and simmer on a low heat until the celeriac is tender. Add the vegetable stock, paprika and salt and pepper. Simmer for a further 10 minutes.
Step 3: Blend the soup until it is smooth and creamy, then return to the stove. Add the milk, stir and heat until it is steaming hot. Enjoy with a slice of freshly baked bread!

Giant couscous and feta salad

Couscous salad

Despite the name, giant couscous is in fact a type of pasta which is toasted and shaped into little balls that look like an enlarged version of couscous. According to Wikipedia, it was invented in Israel during the early 1950s when there was a rice shortage. You can read more about its invention by clicking here. Ptitim, as it is known in Israel, is now becoming increasingly well-known outside the country and is currently a popular ingredient on the menus of many trendy restaurants. It is also known as Israeli couscous or Jerusalem couscous. I used a wholegrain giant couscous to create this nutritious, summery salad. If you cannot find giant couscous, you could substitute regular couscous or orzo pasta in place of it.

GIANT COUSCOUS AND FETA SALAD
(serves 4)

Ingredients

150g giant couscous
100g feta cheese, cut into small cubes
1 small red onion, finely chopped
100g frozen garden peas, boiled
Approx. 10 Kalamata olives, chopped
2 tbsp. lemon juice
1 tbsp. extra virgin olive oil
Black pepper, to taste

1. Cook the giant couscous according to the instructions on the packet. I lightly fried mine in a little olive oil for 5 minutes before adding water and stirring until the water was absorbed and the couscous was tender.

2. While the couscous is cooking, prepare the rest of the ingredients. Boil the peas, drain them and leave them to cool. Chop up the feta cheese and the red onion. Finely chop the Kalamata olives. I prefer to buy the ones which are whole as I think they taste better than the pitted ones. If you do this, take care to remove the stones before including them in the salad.

3. When the couscous is cooked, add it to a large bowl, along with the rest of the ingredients. Drizzle the lemon juice and olive oil over the salad, mix well and serve. Enjoy!